Pulled Sugar Masterpiece

Whenever I get the chance, I take a pastry course to learn something new. They’re always fast-paced, with information overload, but I love multi-tasking and I’m always amazed at what we take home at the end of the day. This class was no exception. It was an introduction to pulled sugar decorating. Here’s the final product:

IMG_2595

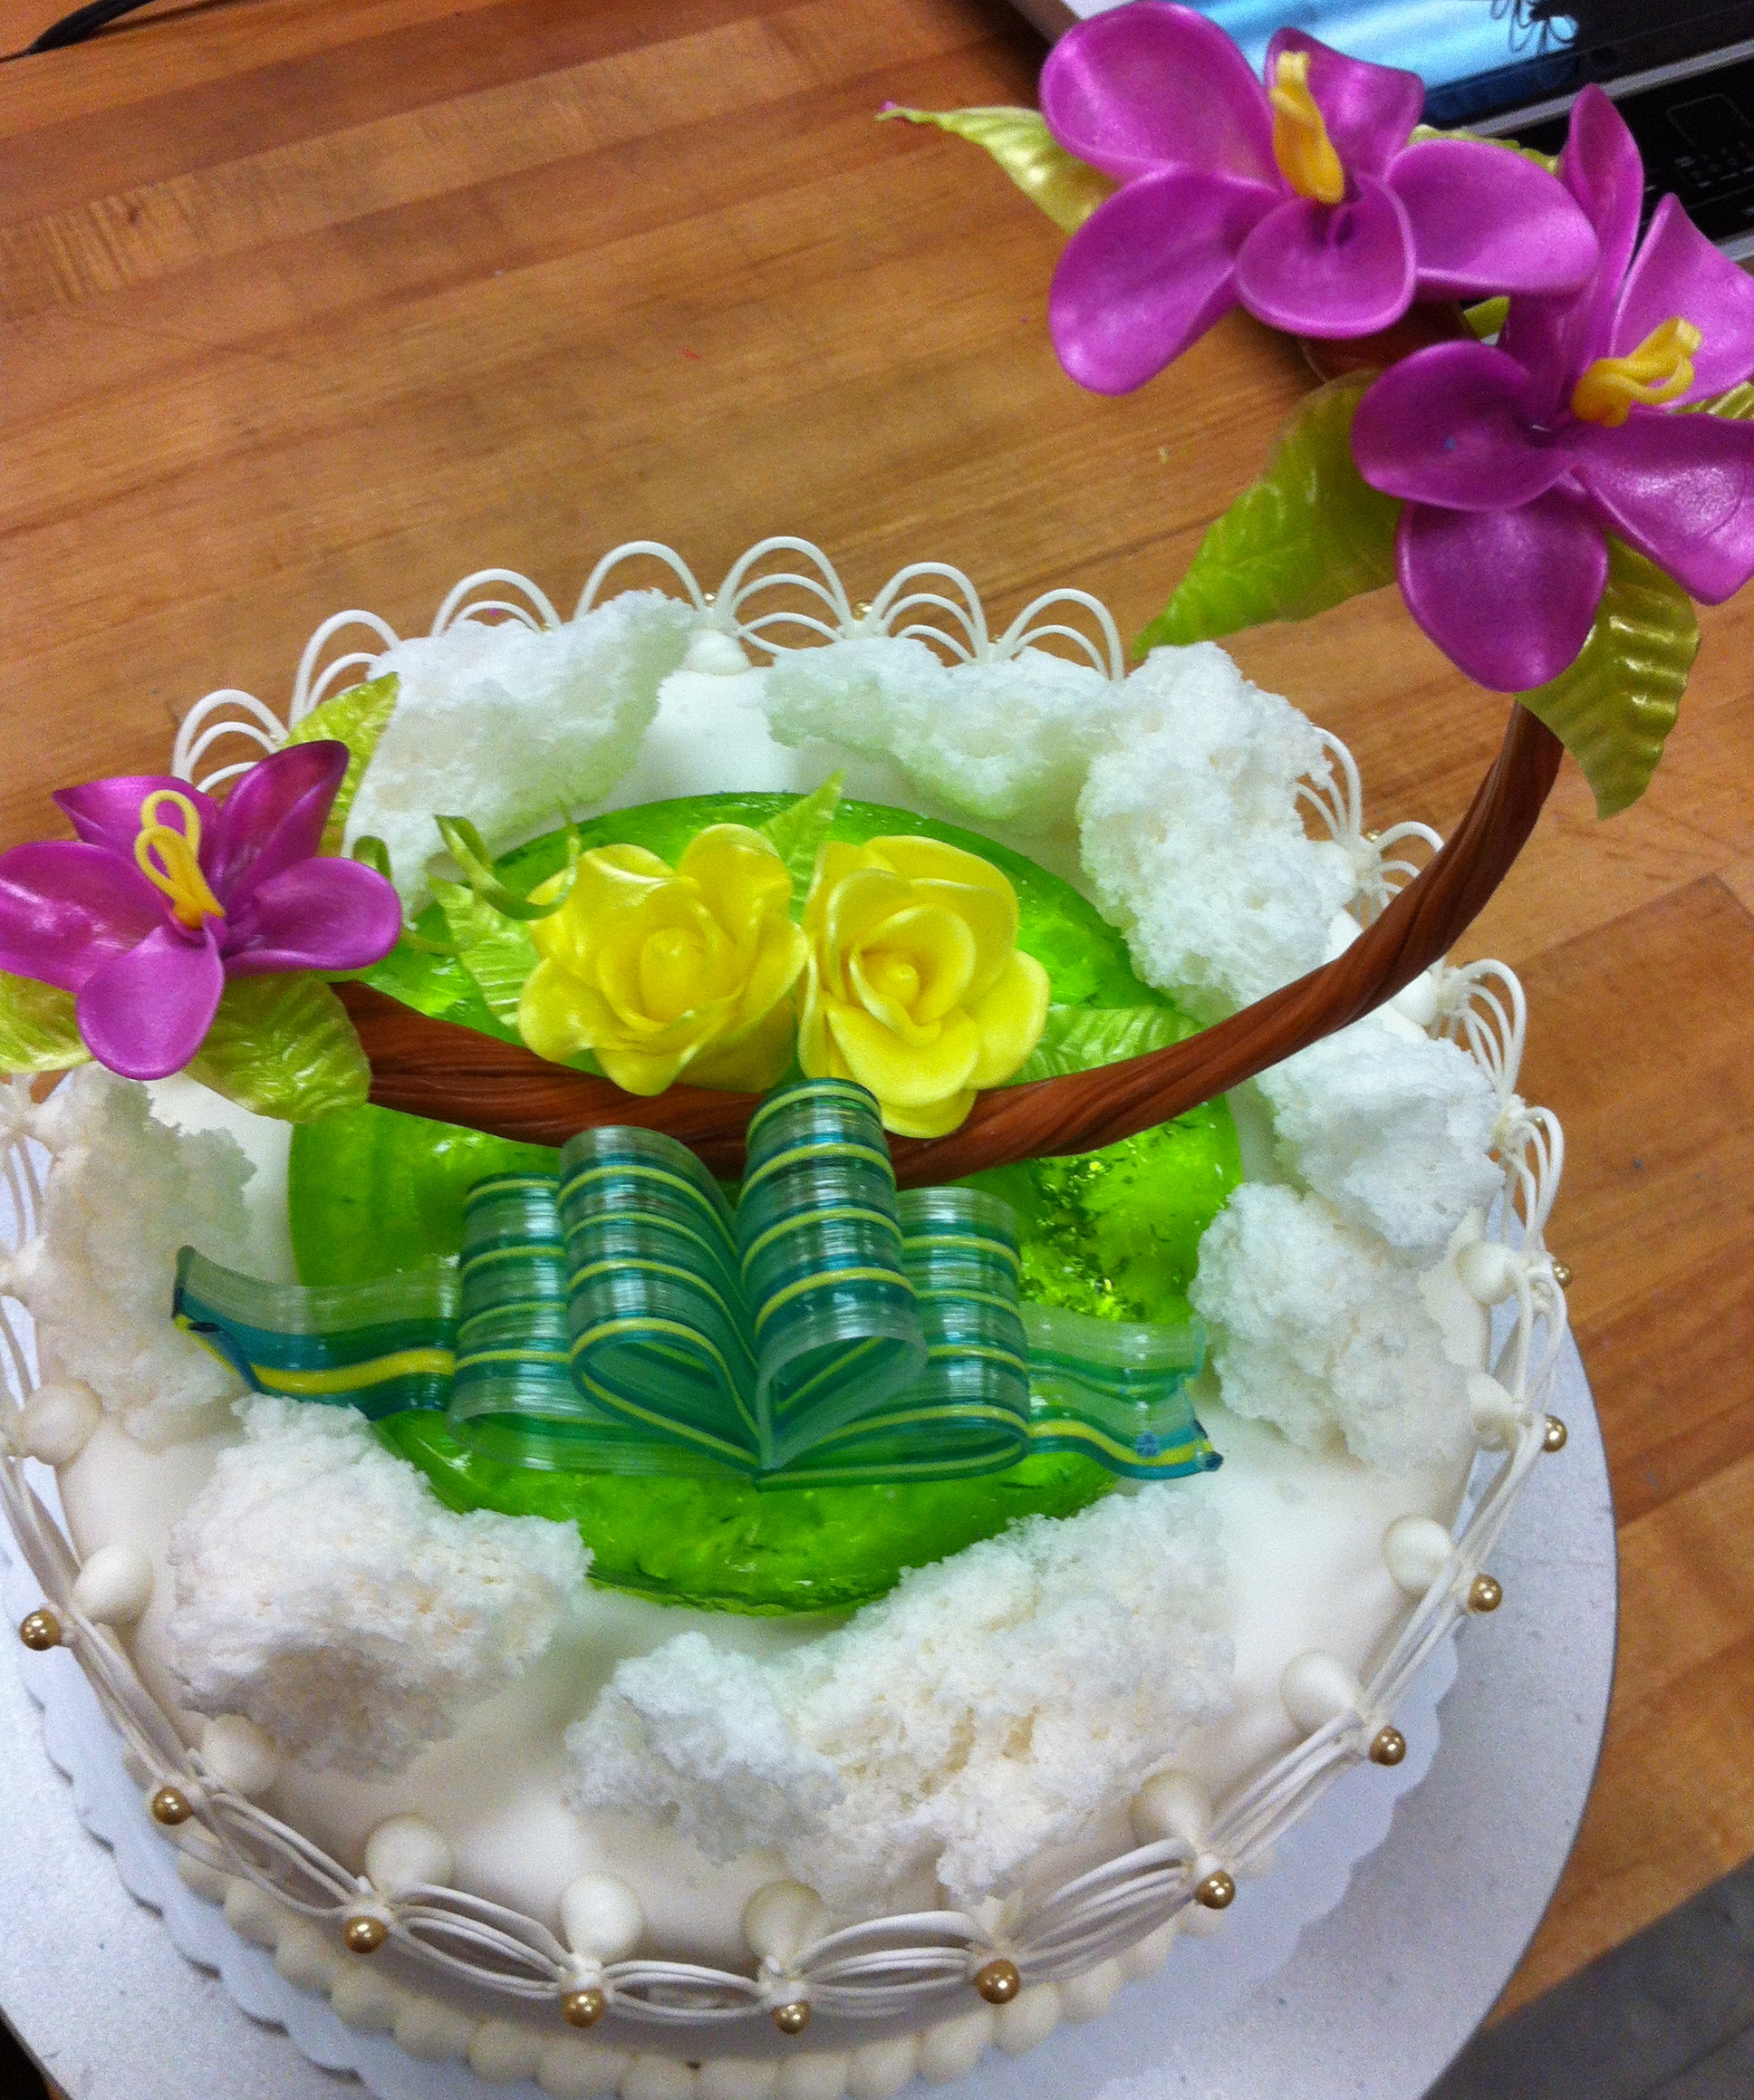
We started out by making our own rolled fondant to cover a layer cake. It was my second time working with rolled fondant, so I had to pretend I knew what I was doing. Next, we piped a bead border along the bottom. Then we got super fancy by piping royal icing in gravity-defying designs. Honestly, I would’ve been satisfied going home with this technique alone in my back pocket, but it got even better.

IMG_2576

Next we made a green sugar base for our decorative arrangement, and twisted a nice simple branch out of pulled sugar that we tinted brown. It was time to work on some pressed leaves and some flower petals. Mine are a little thicker than the pros, but not bad for a first try! Pulling hot sugar repetitively into petals against a steep learning curve can be hard on the fingertips but I was one of the lucky ones that managed to escape without blisters.

 IMG_2609 - Version 2

 Probably the coolest part of the cake is this sugar ribbon. We stacked differently tinted sugar segments in a pattern, and in pairs, pulled and stretched it into a long band that we then formed into ribbon pieces and assembled.

IMG_2585

The last element we added was rock sugar. Making it was a pretty crazy process, with high heat and billowing sugar bubbles, but it looks pretty funky and added a nice element to the design.

IMG_2599

Here’s the finished product, from above. You could smell this cake a mile away, with its sugary sweet aroma. 100% edible, but the most we could bring ourselves to do was nibble at any royal icing spheres that happened to crack, for fear of disturbing its beauty. I need to invest in a heat lamp and a few extra supplies in order to keep up these skills, but they sure make for a phenomenal presentation. Wedding, anyone?

IMG_2596

Never too old for crocodile cake

I’d just completed my first 3D cake (see Where’s Piglet?), and was on a baker’s high. Any excuse to try out a new design was good enough for me, including my husband’s birthday. He didn’t ask for anything special, and so he was quite surprised to walk into the kitchen to find this fierce creature swimming in a sea of blue.

Back Camera

I didn’t get fancy with the cake batter (simple white cupcakes), because I knew I’d be piping up a storm of green icing. I had to search everywhere for square-shaped cookies that weren’t boring biscuits without much flavour or flare. My first rule of baking is that it has to taste good. I found these ones at Safeway, and had to deal with a fair amount of breakage during the prep phase, which I didn’t mind, since they happened to be covered in dark chocolate (my favourite).

Back Camera

Marshmallow eyes and teeth may look fierce but they’re not all that functional as a defence against hungry folks. And our old standby, Runts, rounded out the final details for claws and nostrils.

Back Camera

This cake still gets mentioned as a basis for comparison when the topic of my husband’s next birthday cake comes up.  Wish me luck this summer! Hopefully inspiration will strike soon…

Polkadots, Rainbows and Butterflies

Image

This  is the birthday cake I made for my daughter on the occasion of her 4th birthday. I made the mistake of taking her onto Pinterest with me, to get some ideas for what I thought would be a butterfly-shaped cake with rainbow-coloured icing. We obviously got a little more elaborate than that. This is the post that inspired us: http://blog.hwtm.com/2013/02/playful-rainbow-butterfly-princess-party/

Image

Yes, she convinced me that rainbow layers were the way to go. It wasn’t hard, I was up for the challenge. And heck, it was a long weekend. TONS of time, right? My birthday helper was keen to scoop out and level all our dry ingredients, stir in the colour, and of course lick the bowls (all 6), which made cleanup a snap. I opted for 6 layers instead of 8 – with only 2 cake pans of any given size it would’ve been a bit ridiculous otherwise. You might want to bookmark this page for ideas when my birthday comes around… But back to the cake.

I chose an 8″ cake pan so our layers would be a little thicker, and I’d have enough real estate to level them off. We also tried to go as easy on the colour as the squeeze bottles would allow. Here’s the crumb coat: ImageNext came the polkadots. I picked up some candy dots from Michaels in rainbow colours that happened to match our layers. Lucky! Saved me from messing with 6 colours of icing or melting chocolate. Plus this way, little hands could help. ImageNext came a bit of free styling – a bead border along the base, and a few drop flowers, to attract the butterflies, of course! I used an Italian buttercream, so the texture was nice and smooth. The cake turned out fairly sweet, so it was a good balance, too.

Image

And finally, the butterflies. I piped the borders of each wing with dark chocolate, then filled them in with coloured melting candies, blending with the swirl of a toothpick here and there. Once they were dry, I piped the body, and assembled them by propping one wing up with the attachment pieces of a fancy fondant cutting roller I own but will probably never use for its intended purpose. But now I have used it, so totally not a waste of money, right? Tell my husband, would you?

Image

The butterflies were probably the biggest hit. Thankfully I made one more than there were guests. The chef deserves a little extra reward, no?

I’m somewhat fearful of the expectations I’ve set here for subsequent birthdays, but at the rate my birthday girl is going, she’ll be insisting on making her own cakes before long. Enjoy it while it lasts, right?Image

This is the photo I’ll cherish the most, though: a very happy little person who was so pleased with both the cake, and her contributions to the process of making it, that she insisted on wearing her rainbow dress in celebration. Happy birthday my not-so-little one!

Image